
Decided the DIY route is right for you? Our full breakdown of attorney website builder: DIY or hire a developer covers whether that decision makes sense. This guide is the actual step-by-step process for doing it, from choosing a platform to launch.
Tools Worth Setting Up From Day One
Beyond the builder itself, a handful of free tools make the DIY process meaningfully easier: Google Search Console to monitor how your site is indexed, Google Analytics to see actual visitor behavior once live, and a simple project checklist (even a basic spreadsheet) tracking which pages are done, in progress, or not started. Setting these up before you begin building, rather than after launch, means you are not retroactively trying to piece together data from before tracking existed.
Step 1: Choose Your Platform
Squarespace or Wix for the fastest, most guided setup; self-hosted WordPress with a legal theme for the strongest SEO ceiling if you have some technical patience. Your choice here shapes every subsequent step, since each platform’s editor works differently — pick one and commit rather than switching midway, which effectively means starting over. See the best website builder for lawyers for a full comparison before committing.
Step 2: Register Your Domain
Choose a domain matching your firm name as closely as possible — avoid hyphens or extra words if your exact firm name is unavailable, since a clean domain is easier for clients to remember and type correctly.
Step 3: Map Your Site Structure Before Building Anything
List every page you need before opening the builder: homepage, one page per practice area, attorney bio(s), contact page, and a privacy policy. Sketch this as a simple list or diagram, with your navigation menu structure decided before you start dragging elements around — planning this upfront avoids restructuring navigation later, which is far more disruptive once content is already built. A firm with three practice areas needs at minimum: homepage, three practice area pages, one or more bio pages, contact, and privacy policy — seven pages minimum before any blog or resource content.
Step 4: Choose and Customize a Template
Pick a clean, professional-services-category template rather than anything overly playful or generic. Customize colors and fonts to match your firm’s identity, but resist the urge to over-decorate — simplicity reads as more credible for legal content.
Step 5: Write Your Homepage
Lead with a clear headline stating who you help and how, followed by your practice areas and a prominent call to action. Avoid firm-history-first copy — visitors want to know if you handle their situation before they care how long you’ve been practicing.
Sourcing Photography Without a Professional Shoot
Real photography beats stock imagery for trust, but a full professional photo shoot is not always immediately affordable. A reasonable middle ground: a well-lit smartphone headshot against a clean, uncluttered background, taken during good natural light, genuinely outperforms an obviously generic stock photo. Save the professional shoot for once the practice has revenue — in the meantime, a real, if simple, photo is worth far more than a polished stock alternative.
Step 6: Build Each Practice Area Page
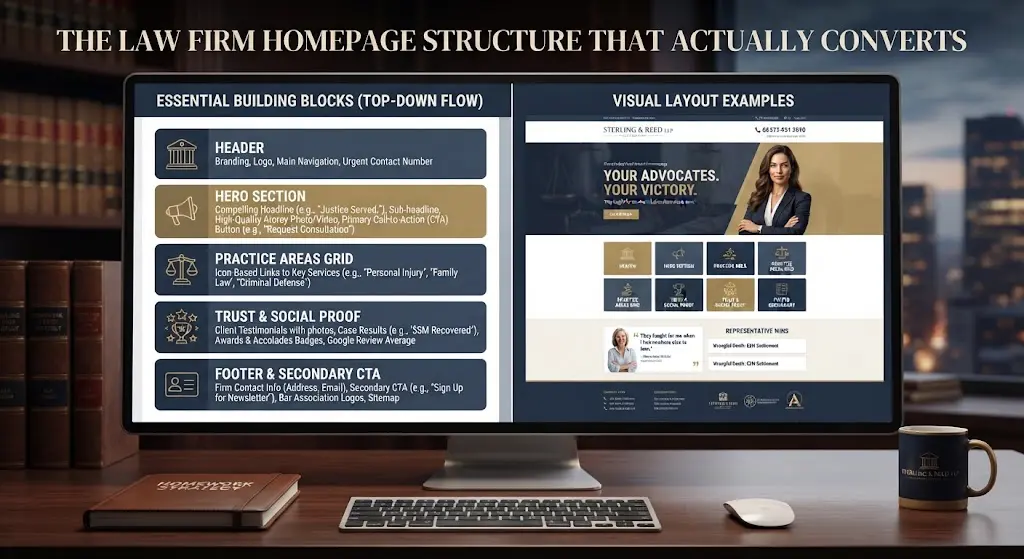
Write a dedicated page per practice area, answering the client’s actual question first, followed by your process and a specific call to action. Our guide on the law firm homepage structure that actually converts covers layout principles that apply to practice area pages too.
Step 7: Write Your Bio Page
Include a real photo, education, bar admissions, notable case types, and a personal opening line beyond a bare credentials list. See how to write and design an attorney bio page that converts for the full approach.
Step 8: Set Up Your Contact Form and Compliance Language
Keep the form short — name, phone, brief case description. Add required attorney advertising disclaimers and language avoiding an unintended attorney-client relationship, checked against your specific state bar’s rules.
Step 9: Basic SEO Setup
Set a unique title tag and meta description for every page, submit your sitemap to Google Search Console, and connect analytics before launch — not after. These take under an hour combined and meaningfully affect whether the site can be found at all.
Step 10: Test Everything Before Launch
Submit your own contact form and confirm you receive it. Check every page on an actual phone, not just a browser resize. Click every navigation link. These checks take twenty minutes and catch the errors that quietly cost leads for months if missed.
Common Mistakes That Slow Down a DIY Build
The most common time-waster is perfectionism on visual details — spending hours adjusting pixel-level spacing before any content is written. Write the content first, then refine the visuals; a page with rough spacing and real, complete content is more valuable than a beautifully spaced page with placeholder text. The second most common mistake is skipping the planning step (Step 3) and building pages reactively as ideas occur, which reliably produces an inconsistent navigation structure that needs reworking later. The third is publishing before testing on an actual mobile device, discovering weeks later that a call-to-action button is inaccessible on phones — exactly the device most legal searches happen on.
Realistic Time Investment
Expect 10-20 hours spread across one to three weeks for a solo practice, single-practice-area site, depending on how quickly content comes together. See how long does it take to build an attorney website for the full timeline comparison against a hired build.
Pre-Launch Checklist
- Every navigation link tested and working
- Contact form tested with a real submission received
- Every page checked on an actual mobile phone, not just a resized browser
- Title tag and meta description set for every page
- Required attorney advertising disclaimers in place and reviewed
- Google Search Console and Analytics connected
- SSL certificate active (padlock visible in browser)
Going through this list deliberately before announcing the site publicly catches the errors that are hardest to notice once you have been staring at the same pages for weeks.
Common Questions About Building Your Own Law Firm Website
Do I need any coding knowledge for this process?
No — every step above uses a builder’s visual editor. Coding knowledge only becomes relevant if you move to self-hosted WordPress and want deeper customization beyond what a page builder plugin offers.
Should I write all the content myself or use AI tools?
AI tools can help draft a starting point, but content should always be reviewed and personalized — generic AI-written legal copy reads as impersonal and can miss state-specific compliance nuances a template cannot account for.
Can I do this process for a firm with multiple attorneys, or is it solo-only?
The same ten steps apply, just repeated for each attorney’s bio and scaled navigation planning in Step 3 to account for more pages — the process does not fundamentally change, it just takes proportionally longer.
What should I do if I get partway through and realize I need help?
Most builders let you hand off admin access to a developer at any stage — you do not need to finish the DIY process entirely before deciding to bring in professional help partway through.
Bottom Line
Building it yourself is entirely possible following these ten steps — just budget the real time it takes, not just the platform’s promised “minutes to launch.” Or see what a specialist build includes instead →
Attorney Website Designers builds custom law firm websites exclusively for attorneys across the USA, when DIY is not the right fit. Book a free 15-minute call to see the alternative.